Showing posts with label free crochet pattern. Show all posts
Showing posts with label free crochet pattern. Show all posts
Saturday, January 28, 2012

Thursday, October 13, 2011
Guest Blogger - Sillygeese Designs & FREE Pattern**
Today I'd like to welcome Shannon of SillyGeese Designs as my guest blogger! If you are interested in guest blogging for me about something crochet-related, please contact me at jaybird [at] acsol [dot] net with your ideas! I look forward to hearing from you!
I made this pumpkin applique a few years ago then never used it. Since it is Fall Harvest time I decided to recreate it and practice my pattern writing skills. I'm going to sew them onto a onsie for my youngest gosling

Of course she just wants to chew on them, but that is quite all right with me, it is washable after all
so I used cotton yarn, you can use what ever you have on hand but different yarns may need different hook sizes and will result in differing finished product. Mine is less than 3 inches long by 1.5 inches at its widest point.
I used mercerized 100% cotton yarn.Sinfonia from Hobby Lobby
ch 15,turn
Row 1: sc in first ch from hook, sc in next 5ch, hdc, dc in next 2, hdc, sc in next 4 remaining ch, (14 total)ch 1 turn,
Row 2:( Back Loop only for whole row)sc in next 4 sc, hdc, dc in next 2, hdc, sc in next 6 sc., ch 1 turn,
Row 3:(in Front Loop Only) sc in next 6ch, hdc, dc in next 2, hdc, sc in next 4 ch, 1 turn,
Rows 4-5: repeat rows 2 and 3.
Row 6:repeat row 2, except do not turn add 2 loops to your hook on the end of your piece, then pull a loop thru all three creating a decrease along the end, repeat , bind off.( I do this by cutting my yarn a couple inches longer then slip stitching and pulling the yarn all the way thru framing a knot, then taking a darning needle and burying the yarn into the piece.

Add stem
on the opposite end from your decreases, pull a loop thru and chain 6
sc in first ch from hook, sc in next 4ch, sc into pumpkin. bind off and bury tail of yarn.


Thursday, October 06, 2011
Guest Blogger - Sharp Crochet Hook & FREE Pattern

Today I'd like to welcome Jessica, creator of the Sharp Crochet Hook as my guest blogger! If you are interested in guest blogging for me about something crochet-related, please contact me at jaybird [at] acsol [dot] net with your ideas! I look forward to hearing from you!

Modern X's and O'x Crochet Edging
Today I am going to show you how to crochet a cute edging on a baby blanket and burp cloth. This tutorial is a great project for a beginner because it is quick, easy, and a lot of fun! This is an appropriate edging for a boy! Not to frilly or lacy.
Materials Needed:
*1 1/2 yards of flannel
*1 Sharp Crochet Hook.
You can pick this up at www.sharpcrochethook.com, shipping is free through the end of the month. The advantage to using the Sharp Crochet Hook is it will go through the fabric much easier than normal crochet hooks because normal crochet hooks have rounded heads.
*1 Package of Crochet Thread. I prefer size 3 because I think it is softest for babies.
*Rounded Corner Template
You can print this from here (it's free): http://sharpcrochethook.com/faq.html
*Scissors
Step 1.
Unfold your fabric. Measure off 11" and cut. This section will be for your burp cloth. The rest will be for your blanket.

Step 2.
Cut out the rounded corner template you want to use. I will be using the 3" rounded corner template today because our border isn't very wide. If you were doing a wider border, I would suggest using a larger round.
Trim off the edges of your fabric. Use the template to cut out all four corners on your burp cloth and the corners of your blanket. I left my blanket folded in half and cut the corners of two layers at once.

Step 3.
Get your crochet thread and Sharp Crochet Hook. Make a loop (slip knot) and single crochet all the way around your fabric every 1/4". (Poke your hook through the fabric.)


When you've finished this first round, start on the second round. You will need to know how to chain(ch) and how to do a double crochet(dc) stitch.
The pattern is: *do 5 dc, skip a stitch and do a dc, then ch 4, then dc in the skipped stitch.* Repeat from *to*.
Here is what it looks like:

If you want to change up the pattern a little, you can just do less (or more) than 5 dc. Here is what it looks like if you don't do any dc in between the "crossovers." In my opinion, it would be perfect for a girly blanket, but since this is for a boy, I like having the 5 dc as a spacer because I think it looks more masculine.

Here is the finished blanket folded.

Any baby would love this handmade gift!
HAPPY CROCHETING!
Wednesday, July 06, 2011
Better Late than Never

OK, so the 4th has officially passed, but you can still make this fun Patriotic Headband for some Summer fun! Check out the July 2011 edition of Ruby for Woman e-Zine for the free crochet pattern from Jaybird Designs!
Thursday, February 10, 2011
Free Crochet Heart Pattern - Ruby For Women
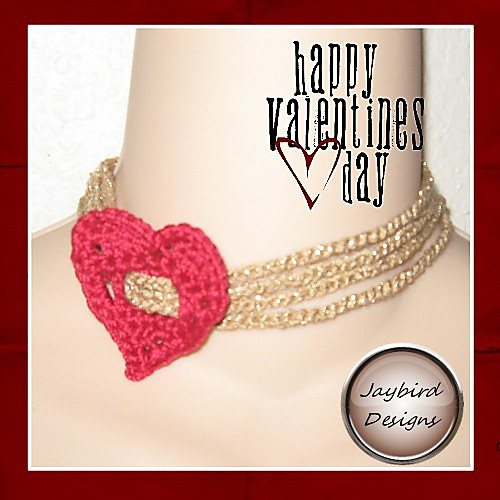
Hey....how would you all like a quick little FREE crochet pattern for Valentine's Day??? OK....twist my arm.....here it is! (psssssssst...if you make something with it, please share! I'd love to see what you come up with!)

download now
You can find more fun projects, tons of inspirational stories, yummy recipes and more in the February 2011 edition of Ruby For Women (a free online magazine!).

download now
You can find more fun projects, tons of inspirational stories, yummy recipes and more in the February 2011 edition of Ruby For Women (a free online magazine!).
Friday, December 10, 2010
Snowflake - FREE Crochet Pattern

I am happy to tell you that I have a new FREE Crochet pattern! You can find it in the Winter 2010 edition of Petite Purls Magazine!!
Snowflake is a simple hat design for even the novice crocheter. Made in wonderful Cascade Sierra (One of my FAVORITE!) yarns and adorned with fun little snowflakes attached to the tie closure. The pattern is written in baby and child size, but can easily be made larger just by adding more rows!
Happy Crocheting!
Snowflake is a simple hat design for even the novice crocheter. Made in wonderful Cascade Sierra (One of my FAVORITE!) yarns and adorned with fun little snowflakes attached to the tie closure. The pattern is written in baby and child size, but can easily be made larger just by adding more rows!
Happy Crocheting!
Tuesday, October 05, 2010
Breast Cancer Awareness Month
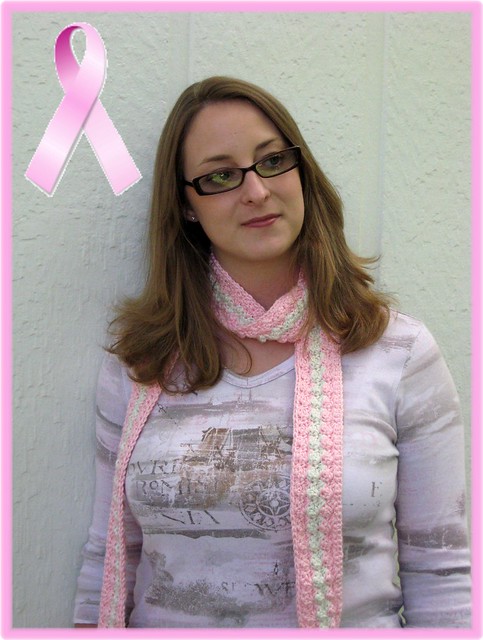
As you know, October is Breast Cancer Awareness Month! A few years ago I wrote this simple pattern for a skinny scarf to help support the cause! I believe the yarn I used is now discontinued, but this free pattern can be made using any worsted weigh yarns you like. I think it would look great in a solid pink, or you can make it in a pink and white stripe like shown in the pictures. It would make a great gift for someone fighting Cancer and for survivors! (The model is my good friend Katie.)
download now
download now
Wednesday, February 24, 2010
Did You Notice??

You can now automatically download my FREE crochet patterns directly from my blog!! Enjoy!!!
-------->
-------->
Thursday, January 08, 2009
Pastel Pebbles Crochet Baby Blanket - FREE Pattern

I forgot to post the actual pattern on my blog, sorry guys!! Again, please
respect my copyright and remember that this pattern has not been tested. If you
find any errors, please let me know!
You can download the PDF version of the pattern HERE.
Also, my wonderful friend BETH created this "cheat sheet" for the stitch pattern, so if you have having any difficulties, download it HERE!
I'm also having difficulties posting it here, so please excuse the "funky" look to it, LOL!!
Pastel Pebbles Baby Blanket
By Jennifer J. Cirka/Jaybird Designs
Materials
Caron, Simply Soft Eco,
80% Acrylic/20% NatureSpun Post-Consumer Recycled Polyester, 5oz/249 yards per
skein, 4 skeins required, color – Lilac Bud
I-9 / 5.5 mm crochet hook
Yarn needle
12 feet, 3/8” ribbon
Finished Size
Approximately 35”x40”
Gauge
In pattern: 9 sts x 7 rows = 4”Special stitches
Hdc2tog: yo, insert hook into designated st, pull up a loop. Yo, insert hook in next st and pull up
a loop. Yo and pull through all 5 looks on hook.
PatternCh 92
Row 1:Hdc2tog over the 3rd and 4th ch from the hook. *hdc2tog
over the 2nd ch of the previous hdc2tog and the next ch. Repeat from
* across. Hdc in same st as 2nd st of the last hdc2tog. (89 hdc2tog,
1hdc)
ch2, turn. Hdc2tog over the first two sts. *hdc2tog over the 2nd st
of the previous hdc2tog and the next st. Repeat from * across. Hdc in same st as
2nd st of the last hdc2tog. (89 hdc2tog, 1hdc)
repeat row 2. Do not finish off.
Border
Round 1:ch1, turn. Sc evenly around edge of blanket, placing 3 sc in each corner. Join with a sl st to first sc.
Round 2:ch2, hdc in next st. *ch1, sk next st, hdc in next 2 sts. Repeat from * to corner, ending with second hdc of pair in corner st. (ch1, hdc, ch1)** hdc in same corner st. hdc in next st. Repeat from * to ** 4 times. Join with a sl st to second ch of beg ch-2.
Round 3:sl st to the first ch-1 sp.
Ch1, *(sc, ch2, 3dc) in same sp. Repeat from * around. Join with a sl st to
first sc. Finish off and weave in ends.
Weave ribbon along border round 2. Tie in a pretty bow at corner or sew ends together.
Copyright
Copyright 2009 by Jennifer J. Cirka (aka Jaybird Designs) all rights reserved. This pattern is for personal use or for gifts only! Sales of this finished product are discouraged. No part of this document may be reproduced or transmitted in any form by any means, electronic, mechanical, photocopying, recording, or otherwise, without prior written permission from the author. Please feel free to link back to this pattern.
Monday, January 05, 2009
January Free Crochet Pattern
Well, it's here! 2009!! Let's start this year with a BANG!!
How about a FREE crochet pattern? I just listed the Pastel Pebbles Baby Blanket for you to download! This sweet blanket will get your new year of crocheting warmed up! You can purchase/download it here! And, please remember that if you are having trouble with the stitch pattern, there is a link to another PDF download in the description that you can use.

Also, love is in the air at Jaybird Designs! Have you seen the new Valentine's category? You can now purchase these sweet items!


And I'm not done yet! Have you seen the February 2009 edition of Crochet World Magazine?? If so, recognize these?? Now you can get your very own holiday hats custom crocheted by the designer.


One more note, there seem to be some strict new laws going into effect in February concerning items made for children 12 and under. I am optimistic that this law will be amended or changed, but should this not happen, I will no longer be creating custom or ready-to-ship items for anyone under 12 after that date.
Happy Crocheting!
Subscribe to:
Posts (Atom)